

Start my wrapping your chosen string material around your hand 3-5 times. You need three pieces of string that is the same length.
Your strands can be all the same colour (like the picture below) or if you want your bracelet to be multi-coloured, which is what I will be showing you today, then just make sure to have at least two strands that are different.

Then leave about 5cm of length and tie a knot to secure the three strands together.

With the extra 5cm, secure it down with tape. Then take the middle stand, pull taut and secure with tape.
When making a multi-coloured bracelet, the two outter stands are the most important. The middle strand can be whatever colour, it will not make a difference.
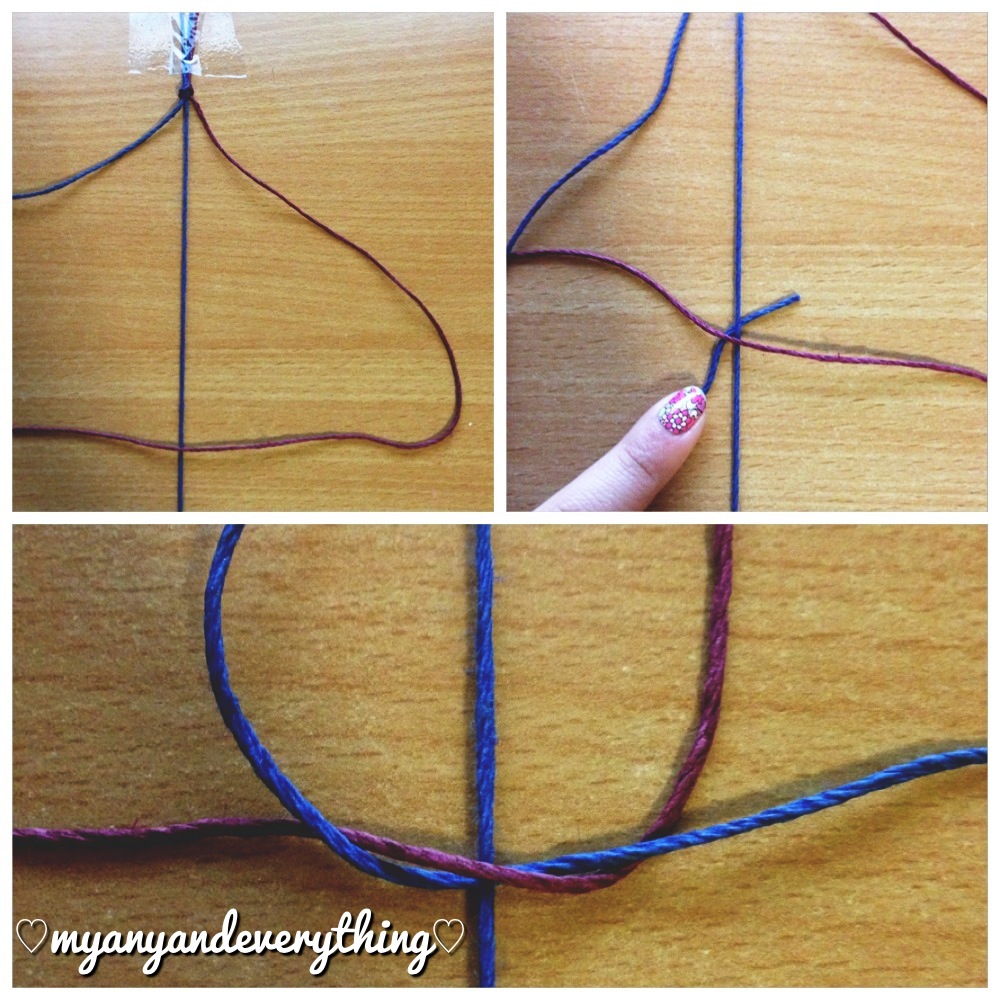
Start which ever side you would prefer. It does not matter.
Simply make a triangular shape with one of the strands, making sure the strand crosses over the middle stand. Then take the other strand and slide it under both the opposite strand and the middle strand. Then simple pull both strands through.

You should get this above result.

And then do so again on the opposite side. And then continue to repeat and alternate.

Once you have reached your desired length, tie a knot on the end to secure your creation.
I wanted to apply a jewelry closer on the ends to make wearing easier however they were all ridiculously expensive. So I searched how to self make closures. This is called the sliding knot. It is a super simple, quick and easy way to open and close the bracelet.

Firstly, make a loop on whichever end you would prefer. Then lay the loop ontop of the other end. Then take the looped string and from the back, start wrapping it around both the loop and the end string. Make sure to continue wrapping in an upwards motion, meaning after you make the first wrap, make the next two towards the looped end.

After doing it three times, get the end of the wrapping string and pull it through the loop. Then just pull, pull, pull. Keep pulling until everything is in place and neat and tidy :) Then just use scissors to cut off any excess and ties knots where need.

And then TA DA there you have it, a friendship bracelet.
Have a go at making these, so much fun and super cute to wear. Hope you all had a lovely weekend, I can't wait for the next one. Why? Because next saturday, the third of November is my birthday!!! WOOP WOOP!!! ^^ I'll defs be blogging about my night :)
No comments:
Post a Comment